Showing posts with label organization. Show all posts

Wednesday, March 20, 2013

Fabric Stash Note Cards

Back in October, I saw on Pinterest a set of pretty cards used to document one’s fabric stash. I wasn’t interested in purchasing them at 50-cents apiece – especially when I noticed that they didn’t include the metadata for the attributes I wanted to record.

So, as part of the Pinterst Challenge I decided to make my own note cards.

As natural consequence of making card for organizing, I organized my stash. Little Hands helped by verifying the structural integrity of my stash box.

When I was lucky, this is how my stash was previously with a single piece of label tape.

Now I have quite a bit more information: when and where the material was purchased; my project intent; the type and yardage of the material; whether or not it has been prewashed; and the patterns’ manufacturer, designer, collection, and title and colorway.

By theory when I use the material, I can attach a scrap of fabric for a project reference archive.

I drilled two holes in the stack of cards using my paper awl. I don't want to dull my pins when I'm attaching the card. These holes are also useful for tying a stack of unused cards together with a ribbon. (Do remember that in some materials you don't necessarily want to go poking holes into it.)

Now my stash is happily labeled and organized. This picture does look rather drab. I promise I have lots of pretty fabrics! It’s just the pretty ones were prioritized and put in the bin first. I ended up “destashing” nearly six yards of fabric; they’d been lingering for years, weren’t as pretty or useful as my other materials, and simply wouldn’t fit in the bin.

Here is my pdf file that I used to print out my cards. The cut into a 4.25” wide by 3.5” tall card with a half inch of unused paper space.

Thursday, January 17, 2013

Grocery Shopping List Tear Pad

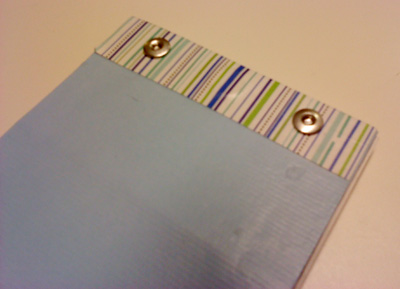
One year ago or more, I pinned a tutorial on how to create a grocery list tear pad to hang on a fridge. Now that I take primary responsibility for the grocery shopping, I wanted to improve our household communication on what needs to be replenished. This picture is my finished product. (Sorry for the blurry picture, my cellphone's camera is lacking.)

grocery shopping tear pad

My first step was to create my own list. The template provided by Beckie at Infarrantly Creative list pretty much everything under the sun: from fish crackers to syrup to sponges. I wanted my checkmark list to only include the items I purchase on a weekly or monthly basis. I think it took my close to 15 grocery shopping trips to settle in on what I wanted to keep on my list. It's pretty personalized; I don't know of any of my friends who buy at least one can of coconut milk a month.

My next step was to create my own template. I used InDesign simply because I like InDesign. Word or OpenDoc would have sufficed. I split my page into 2 columns and used a 1" margin on top, 1/4" margins on all other sides, and 1/2" gutter between the columns. I divided each column into two columns with a 1/4" gutter. I organized the list based on the organization of my favorite grocery store.

Thereafter, I followed the original tutorial with only a few, major exceptions.

The first exception was that I used a bone folder to create a score mark and a "skip stitch" rotary cutter to create perforations 3/4" from the top of the page. I also shortened up the top overlay to only 3/4".

My second exception was that I used an exacto blade to cut a hole into my cardboard so that I could embed my magnet into the pad. I don't want to worry about the small, high-power magnet falling off the pad and being consumed by Small Hands. The first picture below shows the hole I cut, and the second picture is the back of the product after finishing it. My regret on that is that I should have used two magnets on either side of the pad for better stability rather than center the magnet.

I do not know what the overall cost of this project was. I spent $20 on a paper awl because DH expressed that he would prefer I not use his drill to bore through a pile of paper and because I didn't want to wait for a cheaper one to appear on ebay. Well, and I've been waiting for one to fall in my lap for ten years. I spent $2 at Lowe's to purchase 3/8" aluminum posts. I spent $6 at Hobby Lobby to purchase a "skip stitch" blade when really I was looking for regular replacement blade, and then I spent $3 at Michaels to purchase a regular replacement blade. All other supplies I already had on hand, and it's only by coincidence that I needed a new rotary blade for this project. So the cost is somewhere between $0 and $32. =\

Et voila! A successful pinterest-inspired project :)

Friday, September 14, 2012

A Pan Organizer

before

This (recreated) utter mess is what my pans cabinet looked like before this project. The cabinet is in a great location, but I own too many pans for the small space. Unfortunately, all my other cabinets were too far away or even smaller, and the kitchen design isn't conducive to hanging the pans from the ceiling or a wall.

The solution I liked best was the Maple Racks from the Container Store. Those racks what they use to organize their in-store products. I already utilize the similar 4-Sort Dividers to organize my baking pans.

Sadly, those maple sorters aren't the correct dimensions for my cabinets, pan heights, and quantity of pans.

Happily, the construction is pretty obvious: wood + holes + dowels.

This is the solution which DH and I designed. It isn't as elegant as the store-bought version, but it does the job better. I measured the cabinet. DH went to Home Depot, selected the wood, and had them cut it to size. (We lack the equipment to cut it ourselves.) I then measured the height from counter-to-handle-arch of each pan. Using those measurements, I marked where I wanted each dowel to be located; you can still see those penciled notes on the wood itself. DH drilled holes through the first board, cut the dowels to height, stuck 'em in, et voila.

Our original intent was to use nails and glue to affix the two boards and all the dowels into a solid form. Then I might have painted it.

The reality is that this project was started when I was 9 months pregnant and couldn't stand the pan disarray anymore. The supplies were purchased then, but they sat in the garage until Little Hands was 2 months old. At that time, I was frustrated enough with the project to move it forward, but I was too exhausted to add in the finishing steps. I'll admit I now don't have much intent on prettying up the rack because it's functional and it's hidden in a cabinet anyway.

after

Ta-daaaa. This is how my cabinet looks now. It's wonderful to not have to get on the floor and dig to find a particular pan. It's also wonderful to not have to figure out how to shove a pan into the cabinet without it scratching another or falling out.

Want to implement this idea in your own kitchen? Don't forget to pin it!