Showing posts with label paper project. Show all posts

Tuesday, April 2, 2013

Little Hand's First Birthday

Little Hand's birthday was a low-key event with exactly three guests: himself, his dad, and me :) Everything else was likewise simple.

Decorations were kept to the general notion of red, yellow, and blue. (Slightly more complex than our wedding's colors of black and white ^-^). We hung the decorations the night before, so Little Hands could enjoy his decorations. My assessment is that he was charmed by the change of colors in the kitchen.

Yup, unceremoniously hung with masking tape.

I hung a few blue fans from the tray of his high chair, yet Litlte Hands quickly plucked them off for closer inspection and tasting.

His birthday events were likewise simple. When DH came home he blew up a yellow, helium balloon which served as Little Hand's birthday present. Kiddo was delighted by its defiance of gravity. We had all of his favorite foods over the course of the day: formula for first breakfast, fresh strawberries with vanilla yogurt and granola for second breakfast; pepper jack cheese, hotdogs, and tortillas for lunch; spaghetti and frozen peas for dinner, and more formula for second dinner. I made the spaghetti sauce the week before and froze it, so dinner was particularly easy.

Oh? You noticed I missed second lunch? That would be smash cake :) It was a heavy debate between a "healthy" cake and a chocolate cake with chocolate frosting. In the end, I went middle of the road: strawberries, shortcake, and a mound of mildly sweet whipped cream. Little Hands ate with both hands and a serious demeanor, but managed to make a big enough mess to make his mama proud.

Thursday, January 17, 2013

Grocery Shopping List Tear Pad

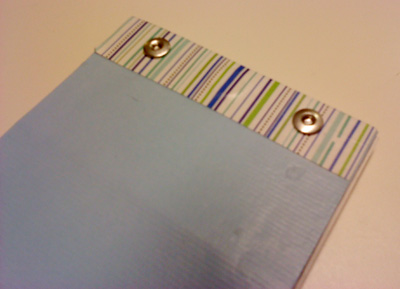
One year ago or more, I pinned a tutorial on how to create a grocery list tear pad to hang on a fridge. Now that I take primary responsibility for the grocery shopping, I wanted to improve our household communication on what needs to be replenished. This picture is my finished product. (Sorry for the blurry picture, my cellphone's camera is lacking.)

grocery shopping tear pad

My first step was to create my own list. The template provided by Beckie at Infarrantly Creative list pretty much everything under the sun: from fish crackers to syrup to sponges. I wanted my checkmark list to only include the items I purchase on a weekly or monthly basis. I think it took my close to 15 grocery shopping trips to settle in on what I wanted to keep on my list. It's pretty personalized; I don't know of any of my friends who buy at least one can of coconut milk a month.

My next step was to create my own template. I used InDesign simply because I like InDesign. Word or OpenDoc would have sufficed. I split my page into 2 columns and used a 1" margin on top, 1/4" margins on all other sides, and 1/2" gutter between the columns. I divided each column into two columns with a 1/4" gutter. I organized the list based on the organization of my favorite grocery store.

Thereafter, I followed the original tutorial with only a few, major exceptions.

The first exception was that I used a bone folder to create a score mark and a "skip stitch" rotary cutter to create perforations 3/4" from the top of the page. I also shortened up the top overlay to only 3/4".

My second exception was that I used an exacto blade to cut a hole into my cardboard so that I could embed my magnet into the pad. I don't want to worry about the small, high-power magnet falling off the pad and being consumed by Small Hands. The first picture below shows the hole I cut, and the second picture is the back of the product after finishing it. My regret on that is that I should have used two magnets on either side of the pad for better stability rather than center the magnet.

I do not know what the overall cost of this project was. I spent $20 on a paper awl because DH expressed that he would prefer I not use his drill to bore through a pile of paper and because I didn't want to wait for a cheaper one to appear on ebay. Well, and I've been waiting for one to fall in my lap for ten years. I spent $2 at Lowe's to purchase 3/8" aluminum posts. I spent $6 at Hobby Lobby to purchase a "skip stitch" blade when really I was looking for regular replacement blade, and then I spent $3 at Michaels to purchase a regular replacement blade. All other supplies I already had on hand, and it's only by coincidence that I needed a new rotary blade for this project. So the cost is somewhere between $0 and $32. =\

Et voila! A successful pinterest-inspired project :)